- The product is strong like an acrylic, providing durability and long-lasting results, but is much more flexible than acrylics, allowing it to grow and flex with the natural nail underneath.
- This flexibility reduces the risk of lifting caused by non-flexible products, which can be a common issue with other nail systems. The flexibility also means that it can be more comfortable for the wearer, as it moves with the natural nail rather than feeling stiff or rigid.
- The product allows for completing all 5 nails at once without worrying about the product running into the cuticle or side walls, saving time and making the application process more efficient.
- The product is easy to work with, allowing for precision and control during application.
Premium Modeling Resin is great for tips, forms, overlays, or fills! Modeling Resin must be used on top of Connect or Connector. To create an extension with Modeling Resin, apply a bead of product on top of the nail form and guide it into the length and shape you're looking for. Remember, product moves product - use product to move product! You can repeat this process across all nails before fully curing 60 seconds LED/2 minutes UV. Modeling Resin can also be used to build structure. Simply place a bead of product in the centre of the nail and guide into your desired shape. You can repeat this process across all nails before fully curing 60 seconds LED/2 minutes UV. Cleanse the nail with Prep & Clean and finish file to refine your shape as needed. Finish off with any colour or top coat of your choice.
How are the Modeling Resins different from Simply Sculpt Build? While both non-self leveling gels, Sculpt Build has no flexibility. Premium Modeling Resin has all the strength, with the added benefit of flexibility.
I already have Connect - can I use that instead of Connector? What about I'm A Base? You can use Connect as your base coat with a Modeling Resin but we don't recommend I'm A Base.
Do I have to use the whole Premium line or can I just use Modeling Resin? The great thing about our unique polymer chemistry is that all of our hard gels can be used interchangeably. You can use Connect as your base coat, you can top off a Modeling Resin with a self leveling gel like Smooth Self Level to eliminate filing, or you can fill your Modeling Resin extension with CBS Build - the choice is yours!
What's the difference between the Modeling Resins, Extender Resins and Ice Gels? The only difference is colour! Our Premium Modeling Resin formula is available in 14 colours total!
- Begin with a properly prepped and cleansed nail. [If using tips or forms, now would be the time to apply.]
- [Optional Step] For extra adhesion, apply a thin layer of Super Bond to the nail and let air dry for 30 seconds.
- Apply a thin layer of Connector or CBS Connect and cure for 60 seconds LED/2 minutes UV.
- With your favourite gel brush, place a bead of Premium Modeling Resin or Extender Resin in the centre of the nail and gently guide it into the desired length and shape. Remember, use product to move product. With Premium Modeling Resin you can repeat the process across all 5 fingers before curing. Cure for 60 seconds LED/2 minutes UV. Apply a second layer as needed.
- Wipe the dispersion layer with Prep & Clean and a No-Lint Wipe and file/buff into shape as needed.
- Apply two coats of your favourite colour or for a natural finish, go ahead and apply your favourite top coat. Cure fully.
- Cleanse with Prep & Clean (if needed) and finish with Renew & Repair Cuticle Oil.
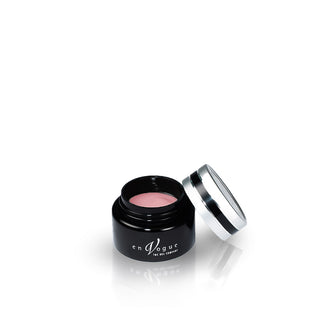
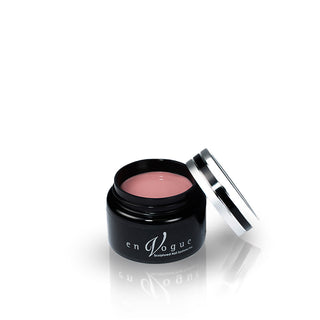
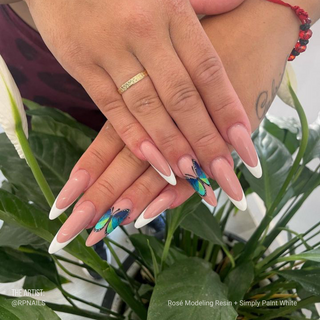
Our Premium Modeling Resins are what started it all! It's a non-self leveling, high viscosity formula designed to provide superior strength with the added benefit of flexibility. It was designed to sculpt any length, any shape, without risk of running into the sidewalls while you work.
The extender resins are camouflage builders; 100% opaque to cover imperfections in the natural nail or to extend the look of a short nail plate.


Adding product to your cart
- The product is strong like an acrylic, providing durability and long-lasting results, but is much more flexible than acrylics, allowing it to grow and flex with the natural nail underneath.
- This flexibility reduces the risk of lifting caused by non-flexible products, which can be a common issue with other nail systems. The flexibility also means that it can be more comfortable for the wearer, as it moves with the natural nail rather than feeling stiff or rigid.
- The product allows for completing all 5 nails at once without worrying about the product running into the cuticle or side walls, saving time and making the application process more efficient.
- The product is easy to work with, allowing for precision and control during application.
Premium Modeling Resin is great for tips, forms, overlays, or fills! Modeling Resin must be used on top of Connect or Connector. To create an extension with Modeling Resin, apply a bead of product on top of the nail form and guide it into the length and shape you're looking for. Remember, product moves product - use product to move product! You can repeat this process across all nails before fully curing 60 seconds LED/2 minutes UV. Modeling Resin can also be used to build structure. Simply place a bead of product in the centre of the nail and guide into your desired shape. You can repeat this process across all nails before fully curing 60 seconds LED/2 minutes UV. Cleanse the nail with Prep & Clean and finish file to refine your shape as needed. Finish off with any colour or top coat of your choice.
How are the Modeling Resins different from Simply Sculpt Build? While both non-self leveling gels, Sculpt Build has no flexibility. Premium Modeling Resin has all the strength, with the added benefit of flexibility.
I already have Connect - can I use that instead of Connector? What about I'm A Base? You can use Connect as your base coat with a Modeling Resin but we don't recommend I'm A Base.
Do I have to use the whole Premium line or can I just use Modeling Resin? The great thing about our unique polymer chemistry is that all of our hard gels can be used interchangeably. You can use Connect as your base coat, you can top off a Modeling Resin with a self leveling gel like Smooth Self Level to eliminate filing, or you can fill your Modeling Resin extension with CBS Build - the choice is yours!
What's the difference between the Modeling Resins, Extender Resins and Ice Gels? The only difference is colour! Our Premium Modeling Resin formula is available in 14 colours total!
- Begin with a properly prepped and cleansed nail. [If using tips or forms, now would be the time to apply.]
- [Optional Step] For extra adhesion, apply a thin layer of Super Bond to the nail and let air dry for 30 seconds.
- Apply a thin layer of Connector or CBS Connect and cure for 60 seconds LED/2 minutes UV.
- With your favourite gel brush, place a bead of Premium Modeling Resin or Extender Resin in the centre of the nail and gently guide it into the desired length and shape. Remember, use product to move product. With Premium Modeling Resin you can repeat the process across all 5 fingers before curing. Cure for 60 seconds LED/2 minutes UV. Apply a second layer as needed.
- Wipe the dispersion layer with Prep & Clean and a No-Lint Wipe and file/buff into shape as needed.
- Apply two coats of your favourite colour or for a natural finish, go ahead and apply your favourite top coat. Cure fully.
- Cleanse with Prep & Clean (if needed) and finish with Renew & Repair Cuticle Oil.


